Tuesday, July 8, 2014

Tropical Avocado Fruit Salad with Honey-Lime Dressing


 Ahhh, the familiar richness of the avocado. I. Am. Addicted.  I have to confess that I used to buy avocados with every intention of using them, but I'd let them sit on the counter because they were "weird" (yeah *I* am the one who's weird) and ended up having to toss them. Over the past year or so, I've eaten more avocados than I have in all my years combined! I simply can't stop! I'm perfectly happy slicing one up and sprinkling with a bit of salt or Tajin seasoning and eating it right out of the skin with a spoon. Such a delicious and nutritious treat! I also love them in smoothies. Check out one of my favorite recipes, the Nutty Avocado.

Most people consider avocado to be a vegetable, but it's really a fruit.  It's confused for a vegetable partially because of it's non-sweet flavor and more often than not, it's used in savory dishes like salads and the oh-so-famous, guacamole!  Others have trouble figuring out when avocado are ripe, and I used to be one of those people. General rule of thumb: If it's green and hard, it's not ripe! If it's dark and slightly soft, it's ripe! You can also pull the stem off the end and check the color underneath.


When I was asked to come up with some recipes for the Avocados from Mexico brand,  I decided to challenge myself and come up with a sweet recipe instead of savory.  And alas was born Tropical Avocado Fruit Salad with Honey-Lime Dressing.  This is easy to make with very few ingredients and is perfect for breakfast or a mid-day snack. Even those who claim not to like avocados will gobble this up. You might even sneak the avocados right by them! Click here to see my recipe on allrecipes.com or print it below!  Let me know how you like it!


print recipe
Tropical Avocado Fruit Salad with Honey-Lime Dressing
Enjoy the taste of the tropics with this refreshing summertime treat. Perfect for breakfast, lunch or a nutritious mid-day snack. Also delicious with the addition of strawberries for an extra punch of color.
Ingredients
  • 1 ripe avocado - peeled, pitted and diced
  • 1 mango - peeled, pitted and diced
  • 1 cup pineapple, fresh diced
  • 2 tbsp shredded coconut
  • half of a 5.3 ounce container Greek yogurt, plain non-fat
  • 1/2 lime - juiced
  • 1 tsp honey
Instructions
Combine avocado, mango, pineapple and coconut in medium bowl.In a small bowl, stir together yogurt, lime juice and zest and honey. Pour over fruit mixture and mix gently. Serve immediately.
Details
Prep time: Cook time: Total time: Yield: 2 large servings


Monday, June 23, 2014

Thin Spaghetti with Garlic, Red Pepper and Olive Oil


Some days I need quick and easy. And some days I need a flavorful side to go with chicken or salmon. And other days, well, i just want pasta! My favorite recipes are ones that have few ingredients, but come out tasting like you spent a lot of time or brain cells on them. I introduce to you, Thin Spaghetti with Garlic, Red Pepper and Olive Oil.  Don't you just love recipe names that spell out exactly what's in them!? LOL  Whatever happened to surprises? Shouldn't this have some sort of cute name like Zippy Spaghetti? Spaghetti with a Twist? Aunt Joan's Crazy Noodles? (I don't have an Aunt Joan, FYI)

Onward...

You only need pasta, olive oil, garlic, red chili pepper flakes, parsley and Parmesan cheese for this one folks! If you have a mandolin, this would be a good time to dust it off and use it to cut the garlic into thin, even slices. Watch those digits!


This is a Barilla recipe I found on allrecipes.com, my fave recipe site. Give it a try, I think you'll like it too! It's easily customizable for even the pickiest eaters. Personally, I added more garlic and red pepper, but tailor to your own preferences by omitting the pepper or substituting other fresh herbs. Tons of possibilities here!


print recipe

Thin Spaghetti with Garlic, Red Pepper and Olive Oil
Thin spaghetti tossed with garlic, olive oil, red pepper flakes and grated cheese makes a quick and easy weeknight meal.
Ingredients
  • 1 box (16oz) thin spaghetti
  • 1/3 cup olive oil
  • 3 garlic cloves, sliced
  • 1/3 cup fresh parsley, chopped
  • 1/4 tsp red chili pepper flakes
  • 1/4 cup Parmesan cheese, freshly grated or shredded
Instructions
1. Bring a large pot of water to a boil. Cook pasta according to package directions, saving 1/2 cup pasta water.
2. While pasta is cooking, heat olive oil in a large skillet over medium heat. Add garlic, parsley and red pepper flakes; sauté 2 to 3 minutes.
3. Immediately add hot pasta to skillet. Stir in reserved pasta cooking water. Mix well. Add cheese and toss lightly.
4. Transfer to a serving platter or bowl.
Details
Prep time: Cook time: Total time: Yield: 4 servings

Saturday, June 14, 2014

Chia rhubarb jam

Rhubarb Chia Jam
 Those who know me, know I am obsessed with rhubarb. I just can't get enough. Unfortunately, it's only available in Spring and Summer. When Spring rolls around, I go on the prowl to find some.  Growing up, we had some growing in our backyard, and I remember mom giving us each a small dish of sugar. We'd cut ourselves a stalk and dip the end in the sugar, take a bite, swallow, repeat.

I bought a couple stalks yesterday with no plan in mind.  Last week I had bought some for the purpose of making strawberry rhubarb syrup for an alcoholic bevy idea I had. THAT didn't happen. After I cooked the rhubarb/strawberry mix, I ended up eating it all. Whoops. This time I promised myself I wouldn't inhale it all in one sitting.

I love jam, but it can be a hassle. I don't normally stock pectin in my pantry, and I don't want to mess with jars and the whole canning process.  I've been on a chia seed kick lately, which makes an excellent thickener, so I thought, why not make rhubarb jam?!

This one's super simple. Chop up rhubarb until you have about 3 cups (this took me 3 medium stalks). Throw into a pot with 1/4 cup of water.


Next, add in 5 tbsp of pure maple syrup. Yes, pure. None of that god-awful fake stuff. I'm sure Aunt Jemima was a nice lady, but c'mon, get real. Not necessary, but I also like to add 3/4 tsp vanilla extract.


Cook the rhubarb, stirring occasionally, for about 10-12 minutes, or until rhubarb is soft and broken apart and most of the water has evaporated.

Take the pot off the heat and stir in 2 tbsp of chia seeds. Let cool. THAT'S ALL SHE WROTE FOLKS! Yes, it's really that easy.


This makes about 1.5 cups of jam.  It keeps in the fridge for 1-2 weeks, but if you're anything like me, it won't last that long.  Excellent on toast, stirred into yogurt or oatmeal, or whatever the heck else you might think to do with rhubarb.  Interestingly enough, the chia seed ends up making it look like strawberries are mixed in.  Enjoy!


print recipe
Chia Rhubarb Jam
Making jam can be tedious, especially the canning process. Make this quick, no fuss rhubarb jam in under 15 minutes from start to finish!
Ingredients
  • 3 cups rhubarb, chopped
  • 1/4 cup water
  • 5 tbsp pure maple syrup
  • 3/4 tsp vanilla extract
  • 2 tbsp chia seeds
Instructions
1. Place rhubarb in medium pot with 1/4 cup water and maple syrup. Simmer over med-low heat, stirring occasionally, for about 10-12 minutes or until rhubarb is soft and water is absorbed. 2. Remove from heat and stir in chia seed. 3. Let cool and pour into 2 small jars.
Details
Prep time: Cook time: Total time: Yield: 1.5 cups

Wednesday, March 26, 2014

Meat-Lover's Slow Cooker Spaghetti Sauce (Slow Cooker)

I have to admit, I'm a spaghetti sauce snob. I was raised on the best of the best. My mom had her own recipe, perfectly simmered for hours and full of meat and veggies. My grandma had her own recipe, and so did all my aunts. Each and every one was fantastic, although I'm biased towards my mom's. None of those wimpy, thin sauces you often see in restaurants.

I love making her sauce, but I don't always have the time to devote to it, so I found a recipe for Meat-Lover's Slow Cooker Spaghetti Sauce on allrecipes.com. My interest was immediately peaked, given the great reviews and the "Meat Lover" part of the title.  Being raised on meat-heavy meals, I expect my spaghetti sauce to be pretty hearty. 

I personally didn't think there was enough meat in here to warrant a Meat Lover title, so I upped the amount of sausage to a half pound. It still could have used more. Next time I will add in another full pound of ground beef/pork mix, shaped into meatballs and cook them in the simmering sauce to absorb all the flavors.


Here are the changes I made to the recipe. I added in:
  • 1 shredded zucchini
  • 2 shredded carrots
  • 1/2 diced green pepper
  • 8oz sliced fresh mushrooms
Because the veggies were cut so small, they were barely noticeable (not that that's a good or bad thing), but they added a whole other dimension of flavor.  I also didn't really see a need to use both Italian Seasoning, then later on use each of those herbs individually. I'd recommend just skipping the Italian Seasoning altogether, and just adding in about 1/2 - 3/4 tsp of whatever herbs you'd like, be it basil, marjoram, oregano, rosemary, and/or thyme.

Because I am watching my calories and carbs, I chose to serve this over spaghetti squash. Did you know that 1 cup of spaghetti squash only has 31 calories and 7g of carbs VS 1 cup of pasta which has 221 calories and 43g of carbs!!!

Although I prefer my mom's recipe for sauce, I'd definitely make this again. It makes 8 servings, and it's perfect for dinner and a couple lunches, and freezing half for later use.

Wednesday, March 19, 2014

Mazola Corn Oil - Part of a Heart-Healthy Lifestyle?

Today is a special day for me. It marks exactly one year since I started my "Get Healthy" journey. I have done this by exercising regularly and logging my food in the My Fitness Pal app on my phone. I have lost 60lbs and have kept it off. My journey has turned into a permanent lifestyle, one that has made me healthier than I have been in years.
 
Having an unhealthy diet may contribute to your risk of heart disease, so it's very important to take care of your body and what you put in it. Did you know that corn oil lowered LDL cholesterol by 10.9% compared to extra virgin olive oil’s 3.5% reduction, making corn oil more effective? Corn oil is naturally rich in phytosterols, compounds that block the absorption of cholesterol. In recent years the push has been towards using olive oil in everything because olive oil was thought to be much healthier. With this new study, it's nice to know that using corn oil is just as good, if not better than olive oil. Corn oil is also more versatile because of the higher smoke point. Learn more about the healthy benefits of cooking with Mazola® Corn Oil here.

What I really enjoy about using corn oil is that it's nearly flavorless, unlike olive oil, so it won't overshadow or impact the overall flavor of your dish. I made two FABULOUS recipes this past week using Mazola® Corn Oil that are sure to wow your family and guests too!

The first was Sweet & Spicy Salmon with Grapefruit Salsa. This is a really impressive meal, worthy of a fine restaurant price. I would definitely make this again to impress guests. It comes together quickly and is packed with flavor. I loved the combination of flavors...the buttery salmon with the slightly spicy rub was a perfect match for the tartness of the ruby red grapefruit salsa. Next time I will grill the salmon instead of baking it in the oven because I love anything cooked outdoors on the grill! This is a very colorful, summery dish that screams casual backyard BBQ as much as it does upscale indoor dinner party. If for any reason anyone in your household cannot have grapefruit because of drug interactions, feel free to substitute blood oranges, mango, or even pineapple.


The second recipe I made was Pork Carnitas with Cilantro Tomatillo Sauce. I have to admit I was skeptical of this one. The flavors and cooking method do not scream carnitas to me. Carnitas are normally braised or roasted as a whole pork shoulder/butt, then shredded and served. In this method, you cut the meat into small cubes and simmer it. Because the pieces of meat are so small, no shredding is required - and in fact it'd be pretty tedious trying to shred such small pieces.
 
This is basically a shortcut way to have pork tacos if you don't want to wait hours for traditional carnitas, but don't let the shortcut fool you! The flavor is AMAZING. Do not substitute any other cut of pork for the pork shoulder. The pork shoulder, because it is fattier, lends so much flavor to the overall dish. The fat renders down and all the flavors come together in a perfectly-spiced, melt-in-your-mouth meal. The Tomatillo "Sauce" (which should be called a salsa - it's definitely NOT a sauce) comes together very quickly in a matter of minutes. The only thing I'd suggest adding is a sprinkle of salt.


For more delicious recipes, check out the Mazola® Recipe Collection on allrecipes.com.


Monday, November 4, 2013

SPLENDA®, Part Deux

Pumpkin Cake with Cream Cheese Frosting
 
After the great success I had using SPLENDA® Sweetener in the Apple and Squash Bake recipe, I decided to tackle the Pumpkin Cake with Cream Cheese Frosting recipe found on the splenda.com site...and I'm glad I did! OMG, this cake is amazingly moist! I brought it into work and it all disappeared in minutes. Everyone commented about the moistness and I had three people ask me for the recipe. SCORE! Now keep in mind I'm not much of a baker, meaning I make a cake/muffins/cookies about twice a year. And even I nailed this one!
INGREDIENTS
1 cup SPLENDA® No Calorie Sweetener, Granulated
1/2 cup brown sugar
3/4 cup canola oil
1 cup egg substitute
1 (15 ounce) can pumpkin puree
2 cups all-purpose flour
2 teaspoons baking powder
1 teaspoon baking soda
1 tablespoon cinnamon
1/4 teaspoon ground cloves
1/4 teaspoon salt
Frosting
1 (8 ounce) package reduced fat cream cheese
1/4 cup butter, softened
1/2 teaspoon vanilla
1 drop imitation maple flavor
1/2 cup SPLENDA® No Calorie Sweetener, Granulated
1/2 cup powdered sugar
DIRECTIONS
Preheat oven to 350 degrees F. Lightly oil or spray a 13X9 inch pan with baking spray. Set aside.
To make the cake: Place SPLENDA® Granulated Sweetener, brown sugar, oil, egg substitute and pumpkin puree in a large mixing bowl. Mix until well blended. Add remaining ingredients and stir well. Pour cake batter into prepared pan.
Bake in preheated 350 F oven 25-30 minutes or until when a toothpick inserted into the center comes out clean. Cool cake.
To make the frosting: Place frosting ingredients in a mixing bowl. Mix on medium speed until well blended. Ice cake when cake is completely cool.
Optional garnishes: Sprinkle finely chopped walnuts or crushed ginger snaps over the top of the cake.
________________________________________
I love that you mix all the wet and dry cake ingredients in one bowl, unlike most recipes that require two.
After pouring the batter into a 9x13 pan, I mixed up the frosting. I did use more maple extract than called for, probably 4-5 drops or so. The recipe says 1 drop. ONE drop??? Really, nobody is gonna taste that. No need to skimp!
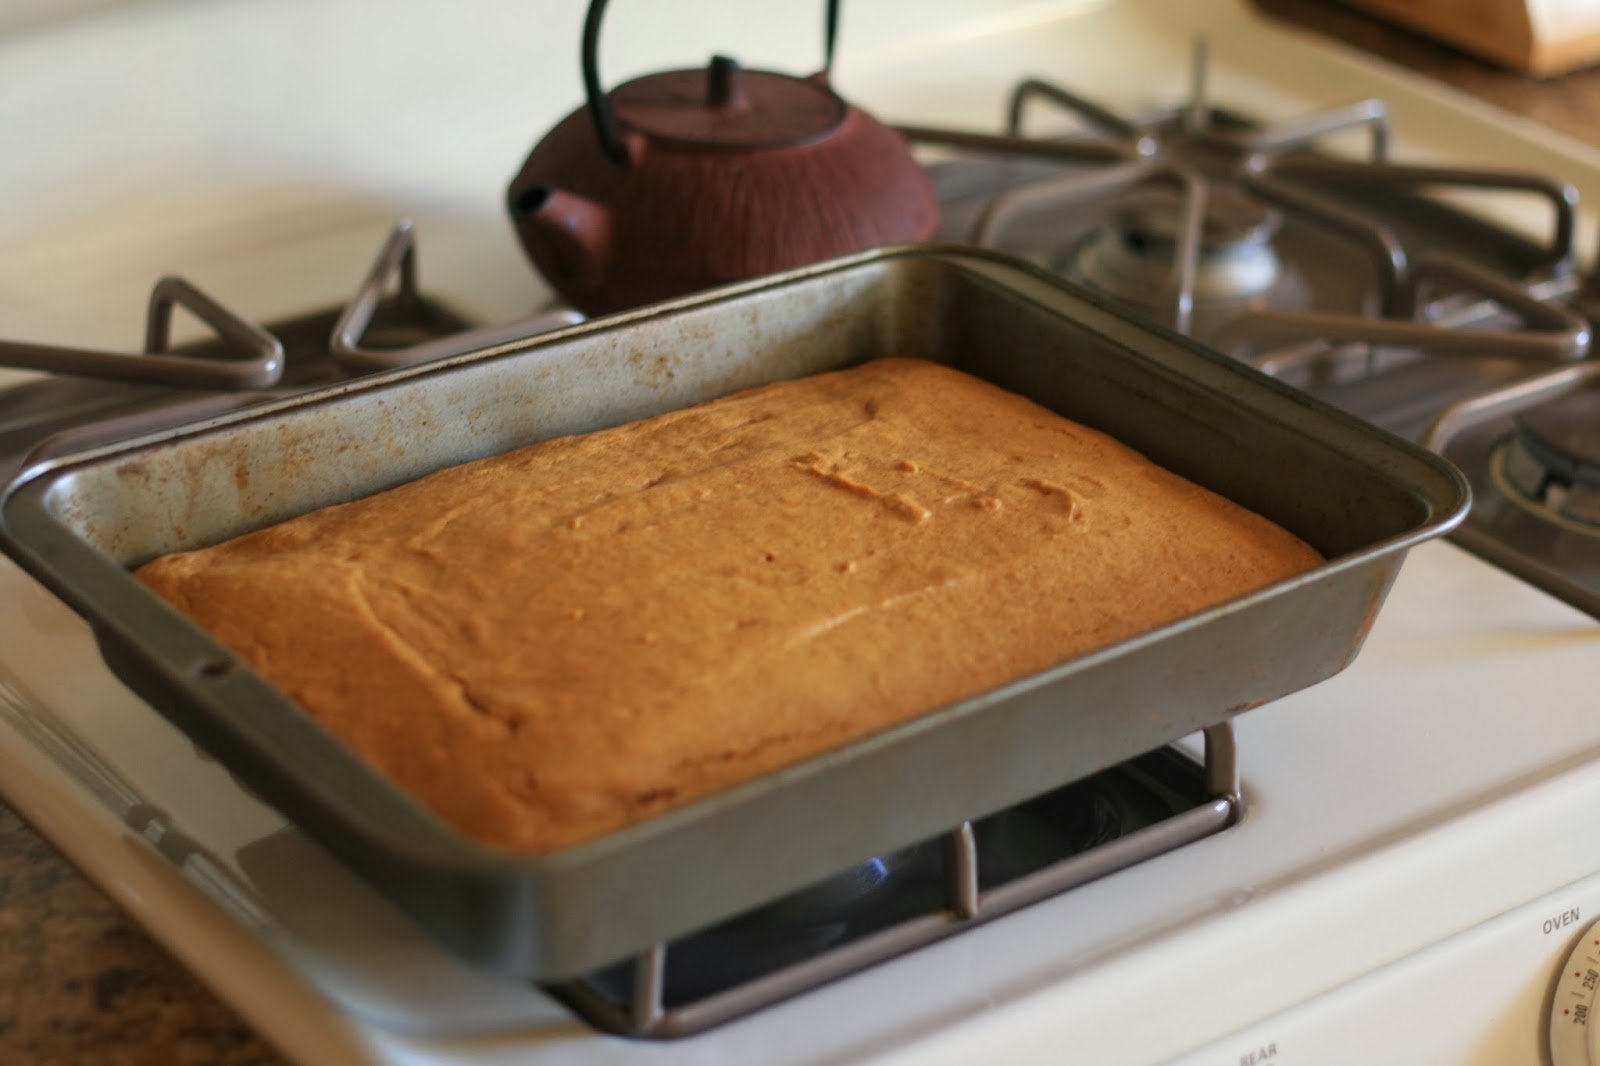
My cake was done after 22 minutes. I'm glad I checked it early! I'm pretty sure I would have cried if I baked it too long. Admit it...that would have been a tragedy. I thought it possibly maaaaybe kinda sorta looked dry when I pulled it out of the oven, but boy was I wrong. The hardest part was letting it cool so I could frost it.
And here we have the final product. Isn't she a beauty? No one at work could tell it was made with SPLENDA® Sweetener. I could taste a bit of a difference, but maybe that's just because I knew what went in it. Either way, this cake is a winner! I was told to bring it in anytime at work!
This cake paired perfectly with a nice warm cup of Chai Latte. I substituted the white sugar in the recipe with SPLENDA® Sweetener with really good results. I also tried this recipe using coconut milk and it was really tasty.
Hope you love this cake as much as I did!
 
* I participated in a campaign on behalf of allrecipes.com for SPLENDA® Sweetener. I received samples to facilitate my unbiased review as well as promotional items as a thank-you for participating.

Friday, November 1, 2013

How Sweet it is...

...or isn't! I'm talking about SPLENDA® Sweetener. Cooking & baking with SPLENDA® Sweeteners means less calories from added sugar. While I don't do a lot of baking, there are times (ahem, Thanksgiving) where sweet sides makes their way into my menus.

I've been trying to live a lower-sugar lifestyle since March, and being able to still enjoy sweet dishes and desserts without depriving myself of the occasional treat makes me happy! I don't use a lot of sugar or artificial sweeteners, but when I do, I much prefer the taste of sucralose (which is what SPLENDA® Sweetener is) to aspartame.

In October, I was lucky enough to try four different SPLENDA® Sweeteners, thanks to their company's generosity. They included SPLENDA® ESSENTIALS™ No Calorie Sweetener with 1 Gram of Fiber, SPLENDA® No Calorie Sweetener (Granulated), SPLENDA® Sugar Blend and SPLENDA® Brown Sugar Blend.

The first recipe I made was Apple and Squash Bake from the SPLENDA® Sweetener website and uses the granulated SPLENDA® Sweetener. This recipe is quick, easy, and only has 120 calories per serving! I easily halved the recipe and used a 1.5qt (6"x9") casserole dish. Speaking of casserole dishes, if you're in the market for some new ones, these are the greatest! And here's a recipe tip: if you don't have Mace (the spice, not the weapon!) that's called for in the recipe (considering a lot of people don't keep that in their kitchens), you can easily substitute nutmeg. Mace can be pretty pricey, but since I'm a spice hoarder (over 100 *cough* different spices/herbs *cough*), I just happened to have some in my cupboard.

INGREDIENTS

1/3 cup SPLENDA® No Calorie Sweetener, Granulated
1 teaspoon molasses
1/4 cup light butter
2 tablespoons all-purpose flour
1 teaspoon salt
1/2 teaspoon ground mace
2 pounds butternut squash - peeled, seeded, and cut into 1/2 inch slices
2 large apples - cored, and cut into 1/2 inch slices

Preheat oven to 350 F.

In a medium bowl, stir together SPLENDA® Granulated Sweetener, molasses, butter, flour, salt, and mace.

Peel and chop the butternut squash into 1/2" pieces and place in an ungreased dish.

Top with the apples.
Pour the topping mix on the apples and squash.
Cover with foil and bake at 350 F for 50-60 mins. Seriously, how easy is that? And OMG, does it smell amazing when it's baking. While waiting for this treasure to bake, I made myself some apple cider. The recipe can be found on allrecipes.com. Instead of the full amount of maple syrup that was called for, I subsituted half for SPLENDA® Granulated Sweetener.

Finally the 50 minutes were up and I ran over to the oven to extract the deliciousness, hoping it would taste as good as it smelled.

And the taste? A whole lotta WOW with the perfect hint of molasses and mace, and the salty/sweet thing I love so much. I should clarify that this is NOT a very sweet side, which in my books is a bonus. This recipe is such a welcome change from the marshmallowy, brown sugary, cloying sweetness of those sweet potato casseroles that seem to pop up at every holiday. *shudder* This recipe will become a staple in my home, especially since it's so quick to make. You should consider serving this as part of your Thanksgiving meal this year!

Stay tuned for my second SPLENDA® Sweetener recipe that I'll be making soon, Pumpkin Cake with Cream Cheese Frosting. I know, I'm already drooling all over my keyboard.

* I participated in a campaign on behalf of allrecipes.com for SPLENDA® Sweetener. I received samples to facilitate my unbiased review as well as promotional items as a thank-you for participating.